Above is a teaser from the last episode; to watch the whole thing, head over to SPIKE.COM
So, once again most of the building process of the 3rd episode of Framework was filled in with Freddy Hill talking about things that I've already forgotten about. But, luckily for me, most of the drama was trumped by the memories of things that I love... creating things.
Now on to the details and the interesting part for those who love to create.
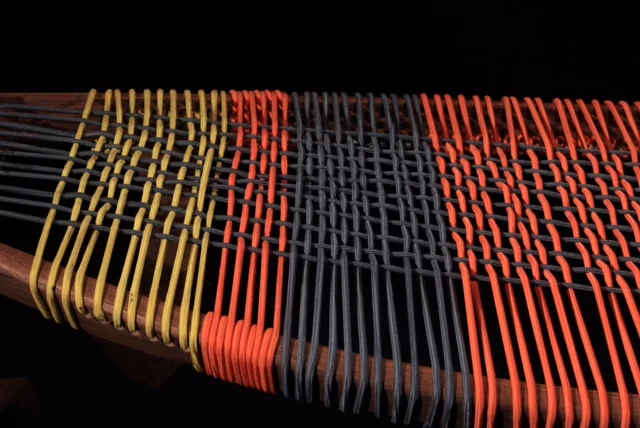
The material I received was a nest of bungee cords, varying in sizes and color, to work with. If you know anything about me, I chose them because of the colors, it's almost embarrassing to admit it, but I truly get fired up and inspired by color. It's like, almost immediately, my brain is firing on a couple extra cylinders!
I like pushing the limits and stretching myself, so when I decided on the Hammock, I knew it was going to be a close call to finish within the allotted 24 hours.
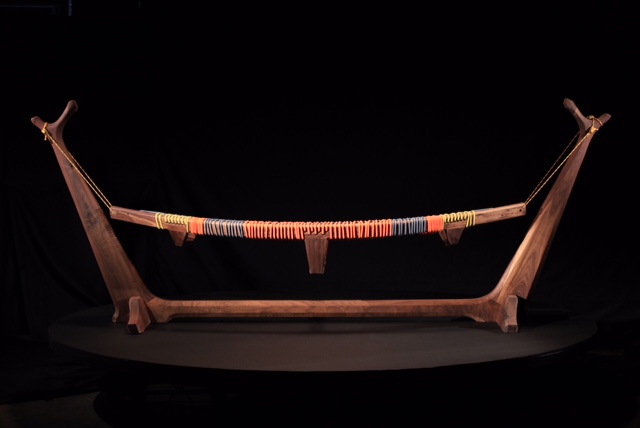
Knowing how much time is needed to bend wood, I started working first on the frame for the hammock; I ripped 8 slices of walnut 3/8" thick and took 4 for each side to make a glue lam. I screwed blocks of wood into the table spacing them about a foot apart making a radius (about a 14-16' radius), then clamped it every few inches to sit overnight. In the morning (2nd day of the build and 4 hours into the 24), I had my frame, then connected the ends and the middle with stretchers, completing the swinging part of the Hammock frame.
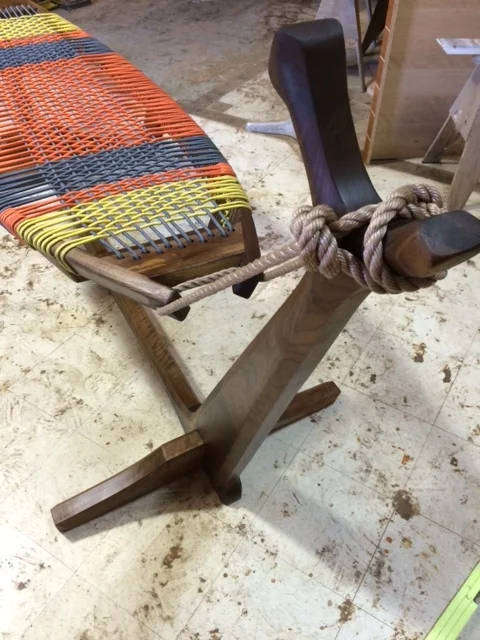
As for the bungees, each cord had a plastic hook with a metal core on the end, so for each cord, I had to use the bandsaw and cut these hooks off, it was such a hassle and took me precious hours. After the hooks were off, I knew I need the longest bungees to stretch from end to end of the frame, but unfortunately, the longest bungees were only 4 feet long. So, by the time I stretched them from end to end,they were pretty taught; if I would have had longer bungees, the hammock would have sunk a bit when laying in it, making it a bit more comfortable, but sometime you have to work with what you have. Lastly, for the frame, I wove through the other bungees from one side to the other, interspersing different colors.
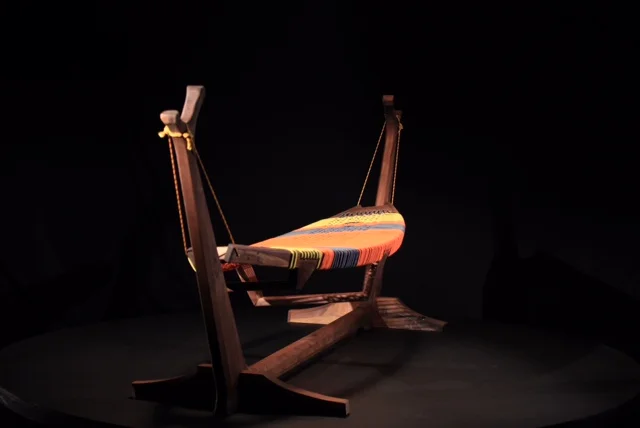
For the base, I ordered 12/4 (approx 3" thick) walnut lumber, I had made templates of the overall shape from 3/4" MDF, then copied that shape onto the walnut and cut it where I was planning on having joints to connect it. I was left with 3 pieces, the two arms and the horizontal rail that connects them. Since many time hammocks are hung using trees, I wanted to give this one an organic feel, so I shaped the arms to resemble branches a bit and planned on hooking my hanging ropes to these branches.
The Festool XL Domino really helped me out on this one, allowing me to join these huge pieces of wood together and in a short amount of time too. Once the Titebond 3 glue setup, I placed my template on the base and cleaned up the edges using a top-bearing straight bit not he Festool OF 2200 router. This is when things got sticky. That 12/4 walnut has some crazy grain and kept wanted to splinter out. Normally, this is a good example of when to take your time, but I didn't have the luxury and ended up paying for it. In the end, I had to glue back in the splintered part and had a bit of time to clean them up.
To finish it off, I sanded, skipping more grits that I want to remember. And once again, I only had time to put on one coat of the Sam Maloof Oil, making me cringe a bit, but finishing the hammock in the allotted time.
A couple months after I finished the hammock, they sent it to Miami for Art Basel, and on its way, they made sure it came by my shop for a couple of days, where I wad able to give it a proper finishing job and some nice hanging ropes.