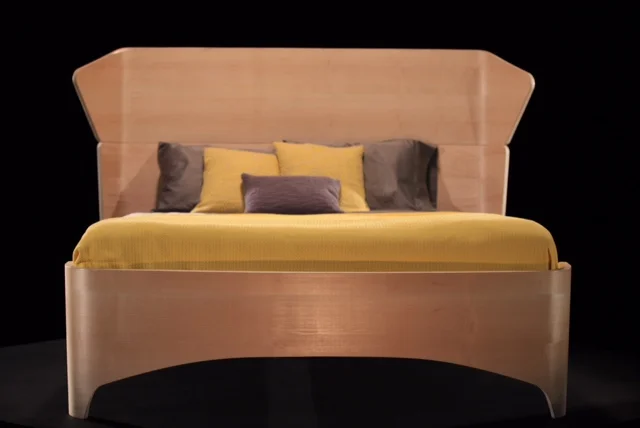
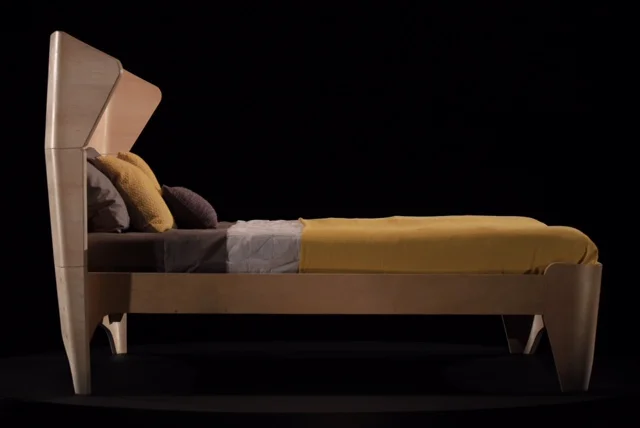
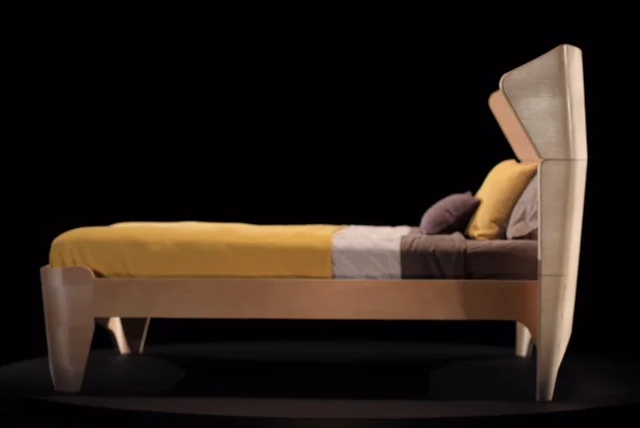
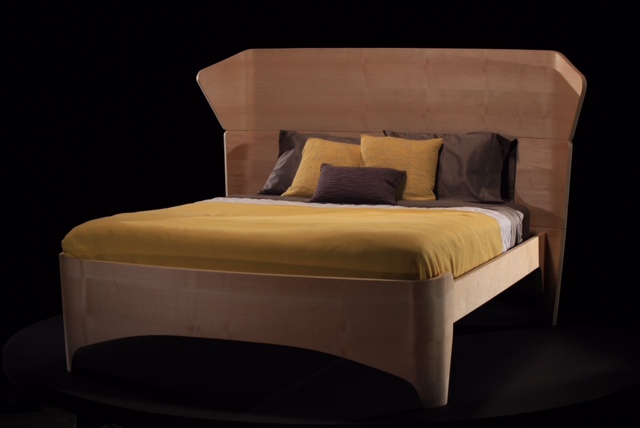
The Reproducible Bed

The difficulties in this fifth episode of Framework were not only in the time-restraints put on us, but also that we were put together in teams of three. You would think that more people on a project mean less work, but that definitely wasn't the case!
As I write this, I struggle to explain or even make sense of how things went down and why; when even, at the time, I couldn't make clear sense of it. I don't want to get carried away with any of the drama because the whole reason for the blog recaps is to give insight a bit into the process. Unfortunately, the process on this one was filled with one problem after another. Considering the capabilities of the people I was working with, we definitely took on more than we would handle; for starters, none of us had ever worked with bent plywood, it's normally somewhat of a simple process, but without the proper practice, knowledge and drive, it can be hard to pull off, especially under a time limit.
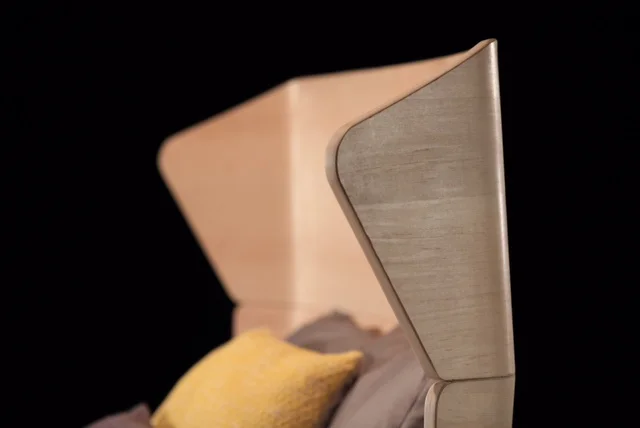
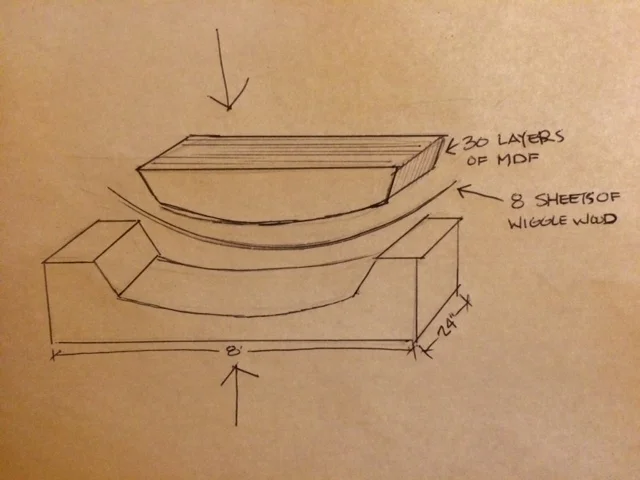
After collaborating and coming up with our design, I created what I call the "mother template"; this was our design, traced out on a sheet of 3/4" MDF from the perspective as if you were looking down on it. The goal was to make two forms where we could sandwich 8 pieces of 1/8" wiggle wood (bendable plywood) in between them. Since the headboard and footboard were different shapes, that meant we needed two forms, a total of 4 of these parts.
In order to make the form, you need to take one piece, rough cut it to the shape, then router it to the mother template, so that each piece is exactly the same. For each part in the form, we needed around 30 layers of MDF. So, when all was said and done, I did this to over 120 pieces of MDF; it is extremely important that each piece be exact because if there are any voids in the form, then there would be bubble in the veneer that we placed over the wiggle wood. After all the layers were router-ed to the same shape, we screwed each piece to the next and created our form; we were then able to place the 8 layers of wiggle wood (with glue in-between) and a layer of Birch veneer into the form, then place the other form on top. Being that there were so many layers of MDF to these forms, we had to use the forklift in order to get the top form on and off. Lastly, we clamped the two parts of the form together until it was absolutely tight.
For each bed, it took four of these bent plywood shapes, 3 stacked on top of each other for the headboard and one for the footboard. Attaching the headboard together was particularly difficult because the curves were compound. So, in order to attach them, I had to scribe one to another and when it wasn't completely tight, I took a cordless skil saw and ran the blade in-between the two until it was tight. I then used the domino to join each piece together.
I really need to stop here to explain something. As I am writing this, and playing back this challenge in my mind, I realize what a huge task we had taken on. There was so much I learned from this episode that I'm not exactly sure why I am explaining how to do something that I did wrong; there are so many better ways to do what I did, so I hope that no one thinks that this was the best way to pull something like this off. Everyday in the shop, I learn something new; if not about wood, then about myself. Most of these lessons I learn the hard way. And I typically keep these learning experiences to myself because they tend to be full of stupidity, lack of knowledge, or thoughtlessness. This bed challenge is just another great example of this, all except for the part of keeping it to myself!
Although most of my learning experiences are either humbling, time consuming, costly, or all of the above, they are always worth it. In the case with this bed, I am looking forward to learning how to pull off bend plywood in the correct way that is successful. Come to find out, it takes some time... much more than 24 hours.
I hope if anything, you learned what not to do.